|
Goal: Identify how to securely publish content to the studio through Scenechronize Prerequisite: Scenechronize access with project admin level permissions Audience: Project Admins |
1. Publish to Studio
NOTE: Watch a guided tutorial here
-
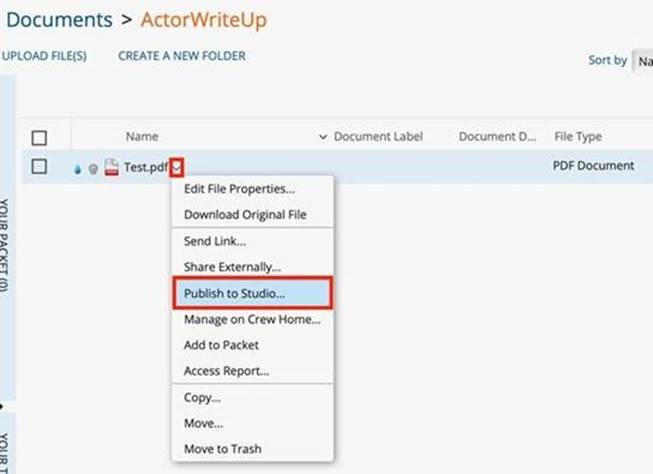
Locate the file to share with the studio, then click the down arrow next to the file name to the right of its name
-
Click Publish to Studio
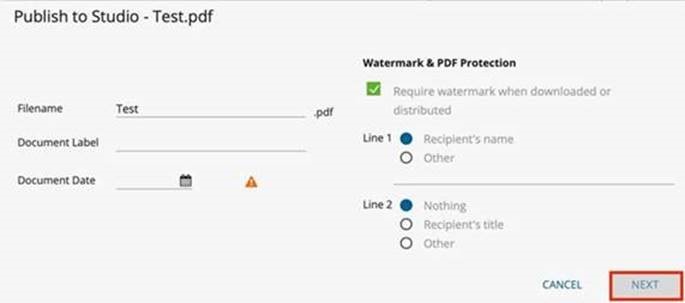
3. A popup menu appears, enter in the file name, label, and date
4. Set the Watermark and PDF protections to match those shown below
5. Click Next
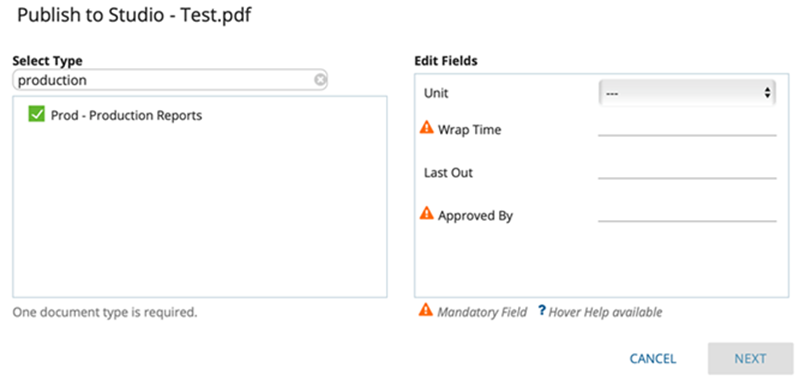
6. Select the file type you are sending to the studio
7. Enter the metadata associated with the file, then click Next
8. Choose the destination folder where the file should be saved
9. Click Finish, the file is now published to the studio